Ads 468x60px

Pages

Tuesday, May 17, 2011

Tuesday Tutorial: Tea Light Flowers

Many of you may have already seen this project on other blogs called “tea light lollipops”. I did a little change to the original and decided to call them “tea light flowers”.  They are pretty easy to make, require only a few supplies, and make great favors for bridal showers and ladies luncheons.

Supplies:
Popsicle sticks or lollipop sticks
Green marker , paint , or stain
Tea light
Small plastic baggies
1 ¼ or 1 ½ inch circle punch
Tag or tag punches
Ribbon
Ink
Stamp
Glue gun
Double sided tape or tape runner
Green cardstock
Colored cardstock (of your choice)
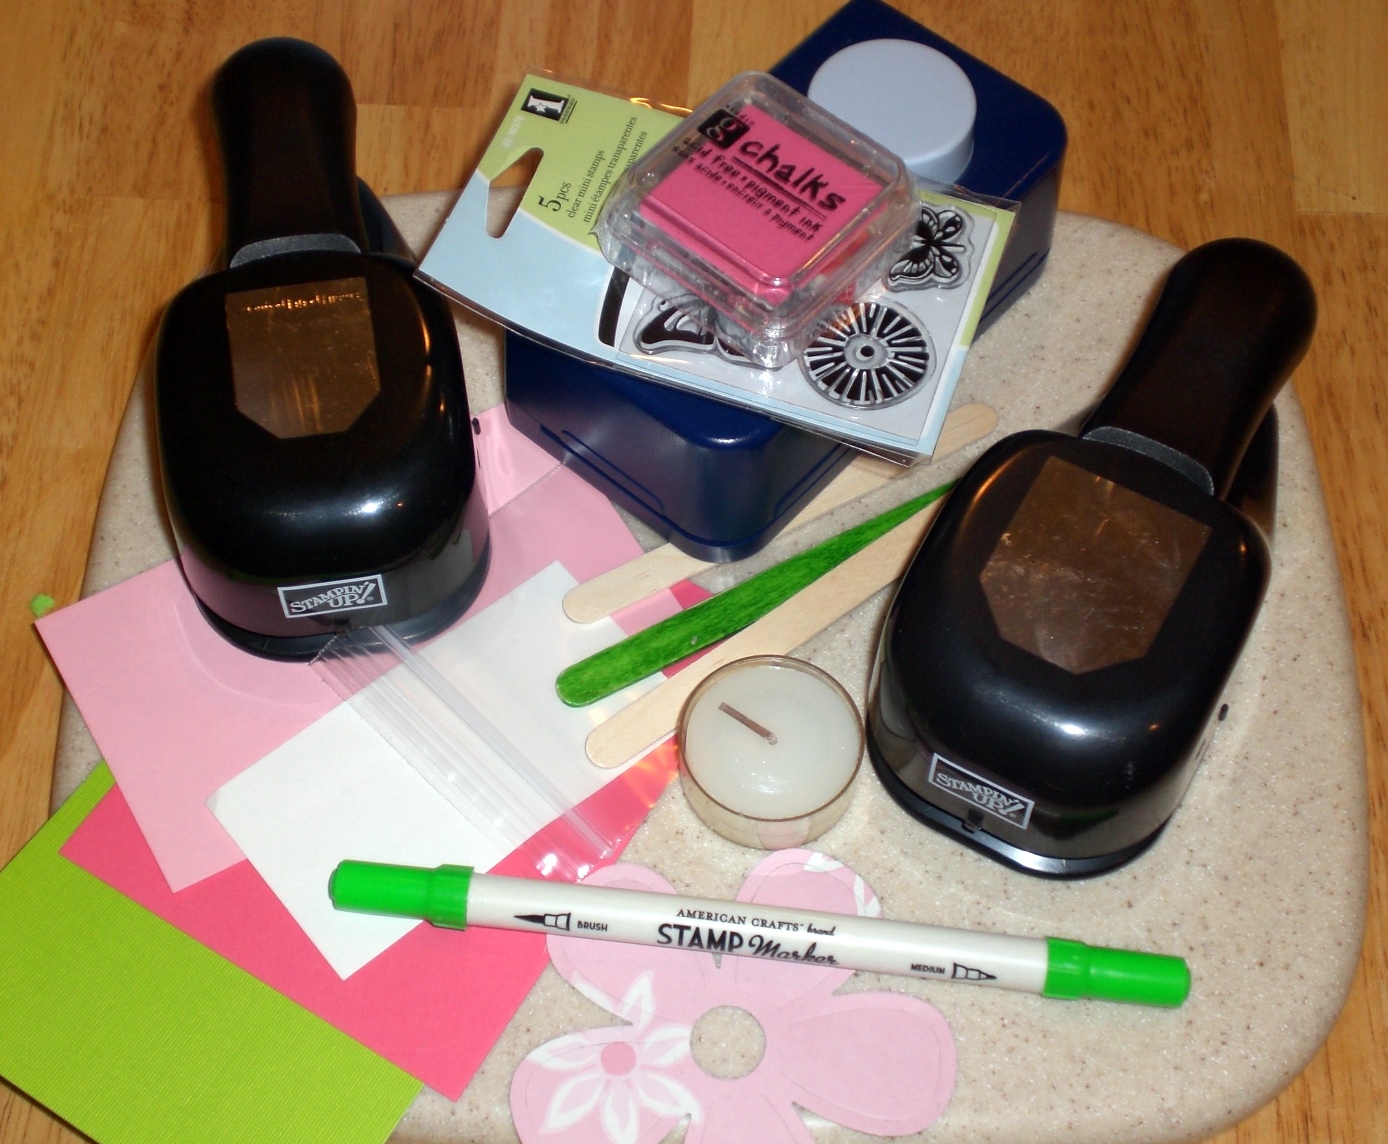

Step 1:  Using a marker, paint, or green stain color the popsicle sticks.


Step 2:  Using glue gun, glue popsicle stick to the back of tea light


Step 3:  Punch out a green circle using circle punch and glue it onto the popsicle stick to cover


Step 4:  Using store bought tag or punched out tag, stamp image or saying using coordinating ink


Step 4:  Place tea light/popsicle stick into small plastic baggie, fasten with ribbon, and add tag. 


This is where most of the other how-to’s stopped. I went one step further, because it just looked a bit plain to me. I made what looked like a lollipop into a flower.

Step 5: (optional) Punch or die cut out a flower from cardstock or pattern paper. Make sure the flower is at least 3” in diameter. Using double sided tape or tape runner, attach to the underside of the tea light.


These were so quick and easy to make that I was able to complete a dozen in just a few hours. We are selling them next month at a library craft sale and sure hope they will be a hit. Our biggest problem is that we aren't sure how much to sell them for. The supplies comes to $1 per completed flower and don't know if asking $2 or $2.50 is expecting too much or not enough.  Please post a comment to let us know what you think concerning pricing.

If you decide to make this project, please attach a link to your blog or FB post in the comment section below so that our followers can admire your work.

Happy Crafting!
Creativity Bug ~ Sue

Monday, May 16, 2011

Featured Freebies for the Week of May 16th

Hello and Happy Monday!

Here are this week's fabulous digital stamps and images freebies found on blogs and websites, or set to us from friends and followers.

Louby Loo's Digital Delights shares Graduation Larry just in time for graduation season

Sew Many Cards shares a digital image of a pot of Spring flowers

Bugaboo Digital Stamps shares two new baby digital stamps

Beccy's Place shares a treasure chest for a pirate themed party

Beyond the Fringe Crafts shares a few something sweet digitals perfect for summer

May Brit shares another puppy digital with puppy brings the mail

The Crafty Journal shares a party giraffe digital image

Looking for a few pages to print and have your kids color? Check out The Fun Coloring Pages blog.

That's all for this week!
Creativity Bug ~ Sue

Friday, May 13, 2011

Recipe Friday: Pasta Salads

The weather is finally getting warm and soon you will be invited to backyard barbacues, family reunions, and outdoor events. This means quick and easy potluck side dishes that will sure to please the crowds.

Grilled Veggie and Pasta Salad


Ingredients:
2/3 cup Italian dressing
4 cups fresh vegetables, 1-inch pieces
1 package (12 ounces) farfalle (bow-tie) pasta

Directions:

  • Pour 1/3 cup of the dressing over vegetables. Cover and refrigerate 1 hour.
  • Heat coals or gas grill for direct heat. Drain vegetables, reserving marinade. Thread vegetables on each of eight 10-inch metal skewers. Brush with marinade. Cover and grill vegetables 4 to 6 inches from medium heat 15 to 20 minutes, turning and brushing twice with marinade, until crisp-tender.
  • While vegetables are grilling, cook and drain pasta as directed on package.
  • Remove vegetables from skewers. Toss vegetables, pasta and remaining 1/3 cup dressing, adding additional dressing if desired.
Speedway Pasta Salad


Ingredients:
1 package (16 ounces) wagon wheel pasta or rotini pasta
1 can (8 ounces) tomato sauce
1 cup reduced-fat Italian dressing
1 tablespoon chopped fresh basil leaves or 1 teaspoon dried basil
1 tablespoon fresh dried oregano leaves or 1 teaspoon dried oregano
1 cup sliced fresh mushrooms
5 roma (plum) tomatoes, coarsely chopped (1 1/2 cups)
1 large peeled or unpeeled cucumber, coarsely chopped (1 1/2 cups)
1 medium red onion, chopped (1/2 cup)
1 can (2 1/4 ounces) sliced ripe olives, drained

Directions:
  • Cook and drain pasta as directed on package. Rinse with cold water; drain.
  • Mix tomato sauce, dressing, basil and oregano in large bowl. Add remaining ingredients; toss.
  • Cover and refrigerate about 2 hours or until chilled but no longer than 48 hours.
Chicken Parmesan Pasta Salad


Ingredients:

8 oz. (3 cups) uncooked pasta nuggets (radiatore)
1 cup fresh baby carrots, halved diagonally
1 cup fresh small broccoli florets
2 cups chopped cooked chicken
¼ cup sliced green onions
½ red bell pepper, chopped
½ cucumber, chopped
1 cup purchased peppercorn ranch salad dressing
¼ cup grated Parmesan cheese

Directions:
  • Cook pasta to desired doneness as directed on package, adding carrots and broccoli during last minute of cooking time. 
  • Drain; rinse with cold water to cool. Drain well.
  • In large serving bowl, combine cooked pasta, carrots and broccoli with chicken, onions, bell pepper and cucumber; mix well. Add dressing and cheese; toss gently to coat.
Have a wonderful and sunny weekend!
Creativity Bug ~ Sue

Thursday, May 12, 2011

BESTeam Weekly Feature - Our Home to Yours

Come check out this week's BESTeam featured site Our Home to Yours owned by Debbie and Amanda from North Carolina.

Debbi is a professional mother (the best job on earth) with bio kids, foster kids, and a newly adopted kid.  Art is her stress reliever and favorite hobby. She is excited to be running an Etsy shop with her daughter Amanda.

Amanda is a working mom with a toddler. She has a Masters in Graphic Design with Fine Arts as her background. She makes all of the avatars and banners for Our Home to Yours.

For  anyone that likes original and one of a kind items, you can find them at Our Home to Yours. When Amanda and Debbi create something, they almost never re-make it. Why? They like to try new things all the time, so if you saw something in the shop that is now sold, let them know and they will re-make it just for you, if they can. 

You will never see a piece of Our Home to Yours jewelry sold and re-listed. Debbi doesn't draw a design first, and rarely buys in bulk. She just piles her beads in front of her, and let's the jewelry design themselves. She feels that if you wanted to look like everyone else, you would be shopping at Wal-mart. 


Updated Vintage Blue Hat with Flower


A pretty steel blue vintage hat refurbished with new trim and flower. The inside measurement is approximately 22" in diameter. I removed the tattered netting and flower, and replaced it with new fabric and a great handmade flower by youaremysunshine here on etsy.


A long silver chain necklace with a deep sapphire blue pendant, the perfect accent for any outfit. The chain measures 22 inches long and the pendant is one inch around. The necklace features a layered look with a double chain.

The pendant boasts a delicate silver spray of foliage against the sapphire blue of the gem. A nice feminine touch to the boldness of the chain.


Looking for the perfect accessory for that new summer outfit? Try this turquoise and lilac and gold beaded necklace highlighted with a bold crystal accented dragonfly. This handmade necklace measures 19" from end to end, and the dragonfly is 1 3/4" long. It's just the perfect length, not too short and not too long. Made with a gold lobster claw, this necklace will not last long, so grab it now!


This is a too cute handmade flip flop. A two tone flower tops off the multi-hued straps of these sandals, great for a day at the beach, or just kicking around town. This is a size xs and measures approximately 9" from toe to heel.


These are only a few of the wonderful items available. Please check out the rest of this beautiful collection at Our Home to Yours Etsy Shop and also take the time to view the Our Home to Yours blog.

The Creativity Bugs love the opportunity to promote other artisans including the fellow Estians but especially the BESTeam group. These friendly, talented, and very hardworking individuals work together to promote their shops and help others with marketing, advertising, and tips and tricks for running an online business. If you are a seller on Etsy, have a blog, and either FB or twitter, then you might be interested in joinging the BESTeam. You can find information about the team, as well as apply for membership HERE!

Happy Shopping!
Creativity Bug ~ Sue

Tuesday, May 10, 2011

Tuesday Tutorial: Poofy Paper Flowers

Hello and Happy Tuesday! We are starting a new feature on Tuesdays that will include tutorials and trash to treasure ideas.  Hopefully my creative other half (sister Sandy) will have the time to post a few tutorials of some of the trash to treasure items she has created for her home.

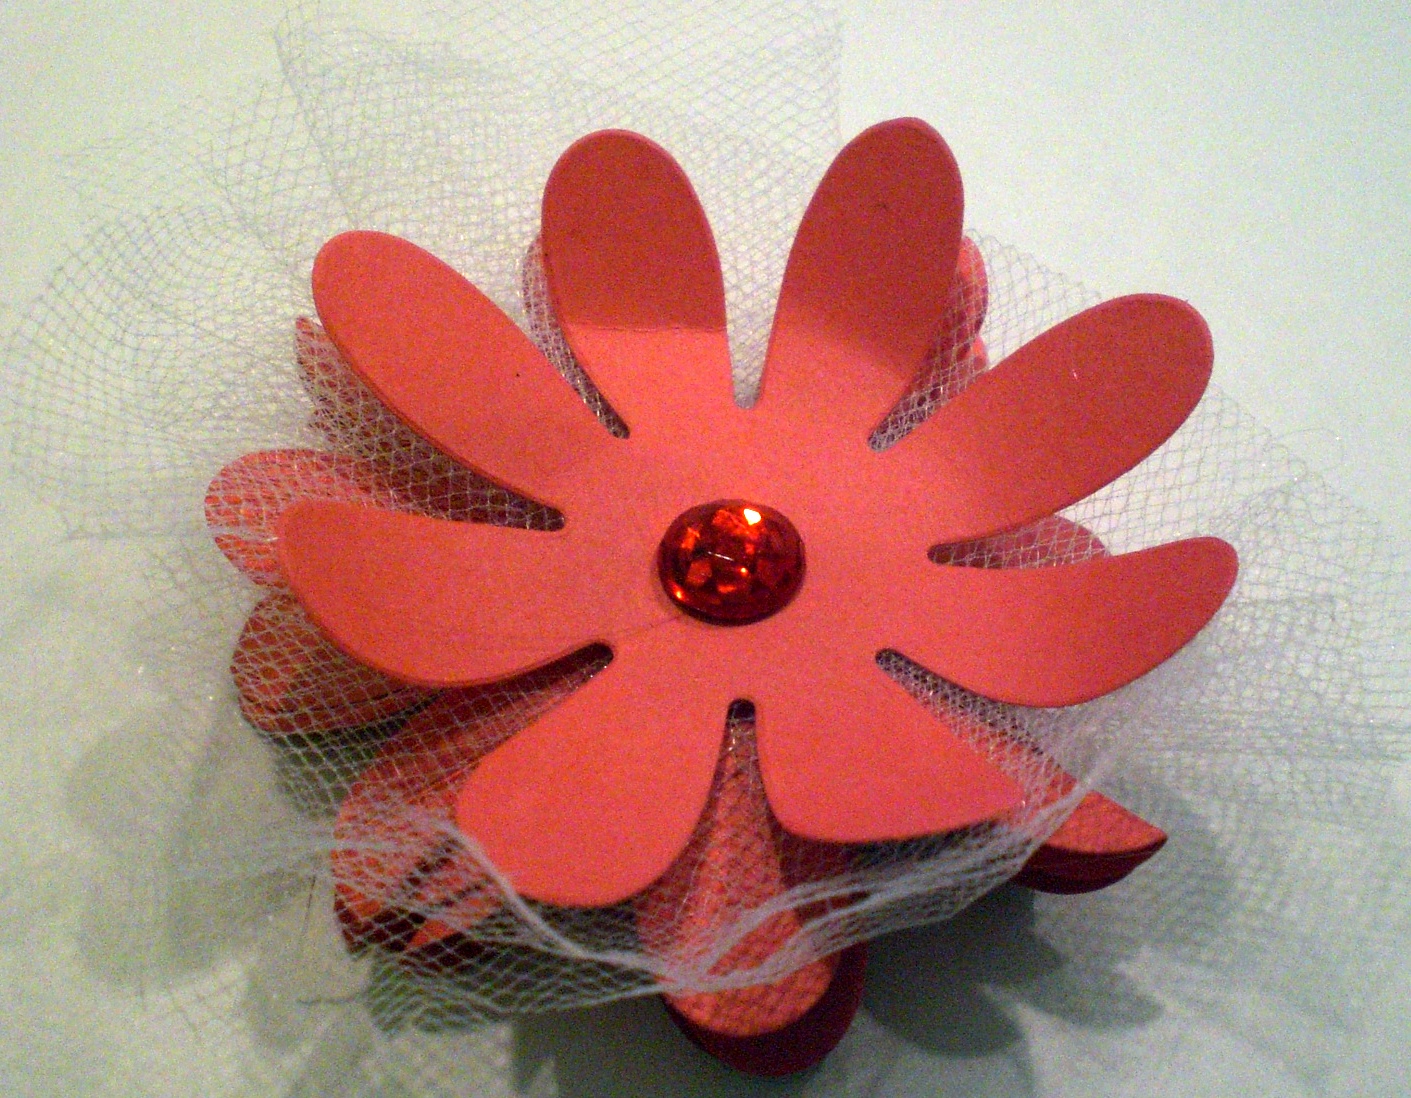
Today is a tutorial on making what I call "poofy" paper flowers. The idea is inspired by Teresa Collins, which I saw demonstrated on YouTube by 217Creations in her video called How to Make a Folded Teresa Collins Flower.

The supplies you will need include:

stapler
glue gun
tulle
5 of the same sized paper flowers (2 inches or larger)
gems, buttons, etc


Step 1:  Take one flower and fold it in half (you will do this to all but one flower)


Step 2:  Fold the flower in half once more


Step 3:  Staple folded flower #1 to folded flower #2 slightly overlapping


Step 4: Staple folded flower #2 to folded flower #3 slightly overlapping


Step 5: Staple folder flower #3 to folded flower #4 slightly overlapping


Step 6:  Fluff the stapled flower parts to "poof" up


Step 7:  Take a 6 -8  inch piece of the tulle, fold it in half, push down in the center with your finger, and staple


Step 8:  Glue tulle to stapled flower


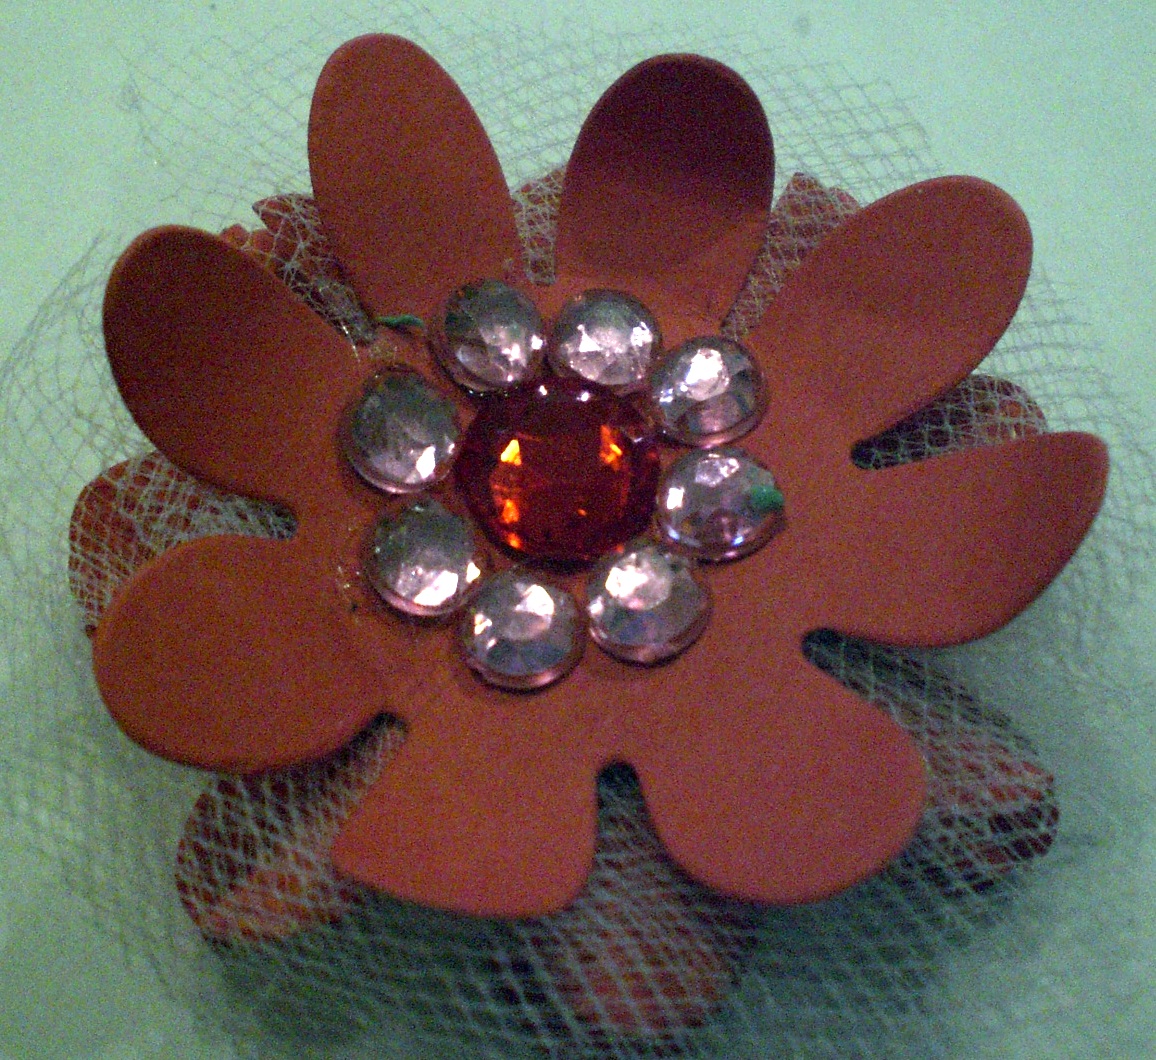
Step 9:  Glue remaining flower on top of tulle/stapled flower and bend petals for dimension


Step 10:  Glue gems, buttons, etc. to create center of flower.


You can add Stickles, spray flower or tulle with Glimmer mist, etc. Be creative and add your own style and flair!


These big poofy paper flowers would be a great addition to gift packages as a topper, embellishments for cards, picture frames, or scrapbook pages, or can be used on other paper crafting projects.

Later in the week, I will make a post and show you a few completed projects that have poofy paper flowers used as embellishments.

Hope you enjoyed this tutorial!
Creativity Bug ~ Sue

Monday, May 9, 2011

Featured Freebies for the Week of May 9th

Happy Monday!

Here are this week's collection of freebie digital images and stamps that we found on blogs and websites or sent to us by friends.

Delightful Inspiration (Designed2Delight) shares with us a spring cupcake digital stamp

Craft Gossip shares a few digital stamps including love birds and frames.

Fonts for Peas shares a terrific set of doodles and dingbats

Tiddly Inks shares Kiki the Shih Tzu dog digital stamp

Wendy Made has a happy monster alien, a set of hearts, and a set of frame digital stamps

Lindy's Maid Wid Luv features an amazing medallion digital stamp

That's it for this week. Happy crafting!
Creativity Bug ~ Sue

Saturday, May 7, 2011

Happy Mother's Day


M - O - T - H - E - R 

"M" is for the million things she gave me,
"O" means only that she's growing old,
"T" is for the tears she shed to save me,
"H" is for her heart of purest gold;
"E" is for her eyes, with love-light shining,
"R" means right, and right she'll always be,
Put them all together, they spell 
"MOTHER,"
A word that means the world to me.
Howard Johnson (c. 1915)

Wishing my mom, sister, and all the other moms & grandmas out there a very Happy Mother's Day!

Creativity Bug ~ Sue