Craft Fancy located at 1818B North Arlington Heights Road, Arlington Heights, IL 60004 is offering a Stamped Ornament class on Thursday Dec 16th from 11 - 1 or 5:30 - 7:30. If you are interested in signing up for the class call 847.670.6065.
Here are the details:
Still looking to create a special heirloom decoration for your home? Maybe you need a lovely hostess gift? Be sure to join Marnie on Thursday, December 16th from 11:00am – 1:00pm & 5:30pm – 7:30pm and make these gorgeous ornament toppers using Oulines Stamps. These would really brighten your holiday season and you can use and cherish them for years to come.
Showing posts with label ornament. Show all posts
Tuesday, December 14, 2010
Tuesday, July 20, 2010
Beaded Ornament
Yet another great ornament idea from bhg.com . What a great way to use up all of your odds and ends of beads and silver or gold ribbons.
Can't wait to make a few of these and post them for all to see.
Creativity Bug ~ Sue
Ice Cream Cone Ornament
I know it is too early to think about Christmas, but I have to plan ahead. This adorable ice cream cone ornament was featured on the Better Homes and Garden site. As soon as I saw it, I knew my version was not going to use a paper mache cone. Instead, I am going to find a heavy tan colored piece of cardstock and stamp it with a waffle cone/diamond patterned rubber stamp inked in another shade of brown/tan. When I am done stamping it, I will shape it into a cone. Don't worry, as soon as I make the ornament I will post the how tos, costs, and a list of my supplies.
I will probably also add some tiny beads for sprinkles and maybe a red pompom or bead for a cherry on top.
Creativity Bug ~ Sue
Quick and Easy Embellished Christmas Tree Ornaments
I am participating in a kids holiday bazaar this December and have been searching for some quick, easy, and inexpensive ideas. All products we sell at the bazaar have to be homemade and sold for under $5 so the kids can purchase gifts for their parents, teachers, grandparents, siblings, and friends. This ornament is made with colored glass ornaments, glue, glitter, and gems.
Quick and Easy Embellished Christmas Tree Ornaments
Once I have my finished ornaments together, I will share them on the blog for everyone to see along with the breakdown of the costs.
Creativity Bug ~ Sue
Quick and Easy Embellished Christmas Tree Ornaments
Once I have my finished ornaments together, I will share them on the blog for everyone to see along with the breakdown of the costs.
Creativity Bug ~ Sue
Saturday, July 17, 2010
The Making of a Ink Ornament How To
My friend Heather and her kids Em and Joey came by on Wednesday to help me put a "how to" demo together on decorating glass ornaments with inks and acrylics. I am writing an article for an online crafting magazine and they need both the "how to" along with pictures.
The supplies:
glass ornaments
PearlEx
Ranger Ink alcohol inks
Ranger Ink applicator and felt pads
ribbon
acrylic paint
dixie cups
cupcake pans (optional)
The first step was to remove the top of the glass ornament and fill it with PearlEx.
Then with a few mists of water, you should be able to swirl the PearlEx mixture to coat the entire inside of the ornament. This was not as easy as first thought and a lot of the PearlEx was wasted.
Put the ornament top side down over a dixie cup and let dry overnight. I placed the dixie cups in a cupcake pan so the ornaments wouldn't easily fall over while they were drying.
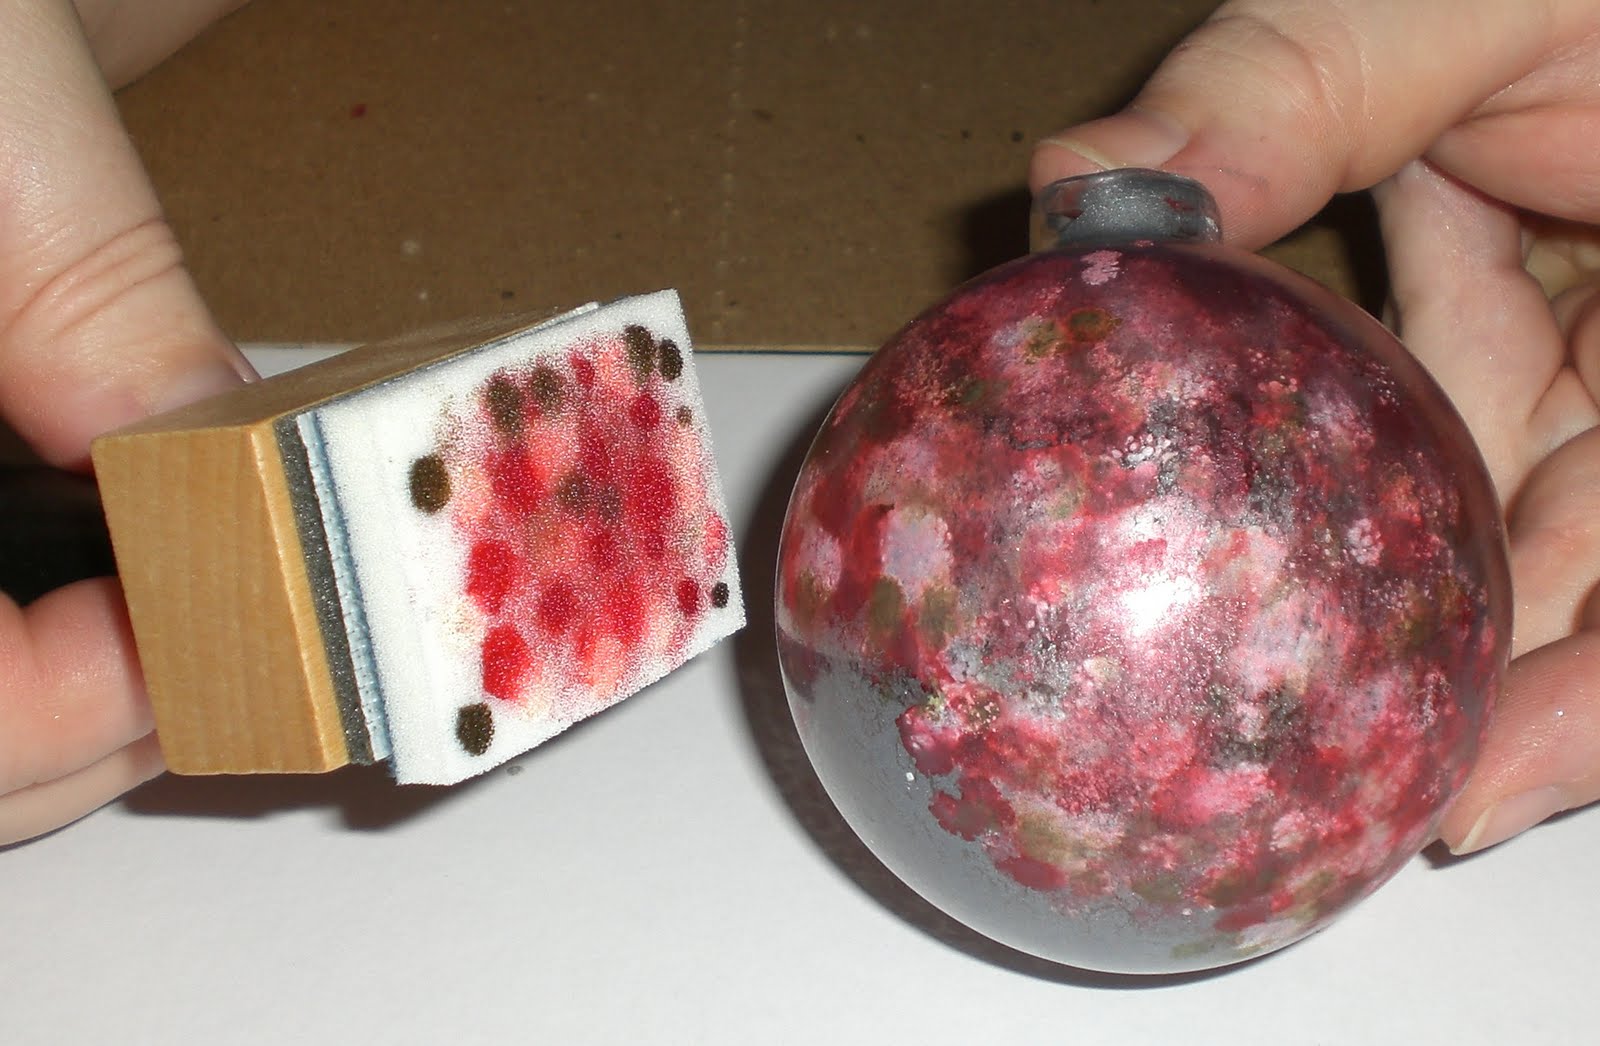
The next day, take any combination of alcohol inks and add it to the applicator with a clean refill pad. Gently stamp the ink onto the ornament.
Let dry and restamp ink again for more coverage. When ornaments are completely dry (about 24 hours) add ornament top and ribbon to hang.
After doing all this, we found the effects to be nice but working with PearlEx was not easy (especially for the kids) as the sparkly dust was everwhere. So, we decided to try another method.
Fill a glass ornament with acrylic paint (we filled ours with cream/white to show up better for the camera).
Swirl the acrylic paint to coat the entire inside of the ornament and shake the excess into the paint bottle. Place ornament top side down over a dixie cup and let dry (overnight). We checked a few hours into the project and found a dixie cup full of excess paint, which easily poured back into the bottle.
The next day, take any combination of alcohol inks and add it to the applicator with a clean refill pad. Gently stamp the ink onto the ornament.
Let dry and restamp ink again for more coverage. When ornaments are completely dry (about 24 hours) add ornament top and ribbon to hang.
We took a poll and everyone liked the acrylic paint with alcohol ink combo the best. The plan is to make a bunch and sell at the school bazaar coming up in December.
Hope you try out this technique and even link back in the comments with your completed ornaments.
Creativity Bug ~ Sue
The supplies:
glass ornaments
PearlEx
Ranger Ink alcohol inks
Ranger Ink applicator and felt pads
ribbon
acrylic paint
dixie cups
cupcake pans (optional)
The first step was to remove the top of the glass ornament and fill it with PearlEx.
Then with a few mists of water, you should be able to swirl the PearlEx mixture to coat the entire inside of the ornament. This was not as easy as first thought and a lot of the PearlEx was wasted.
Put the ornament top side down over a dixie cup and let dry overnight. I placed the dixie cups in a cupcake pan so the ornaments wouldn't easily fall over while they were drying.
The next day, take any combination of alcohol inks and add it to the applicator with a clean refill pad. Gently stamp the ink onto the ornament.
Let dry and restamp ink again for more coverage. When ornaments are completely dry (about 24 hours) add ornament top and ribbon to hang.
After doing all this, we found the effects to be nice but working with PearlEx was not easy (especially for the kids) as the sparkly dust was everwhere. So, we decided to try another method.
Fill a glass ornament with acrylic paint (we filled ours with cream/white to show up better for the camera).
Swirl the acrylic paint to coat the entire inside of the ornament and shake the excess into the paint bottle. Place ornament top side down over a dixie cup and let dry (overnight). We checked a few hours into the project and found a dixie cup full of excess paint, which easily poured back into the bottle.
The next day, take any combination of alcohol inks and add it to the applicator with a clean refill pad. Gently stamp the ink onto the ornament.
Let dry and restamp ink again for more coverage. When ornaments are completely dry (about 24 hours) add ornament top and ribbon to hang.
Hope you try out this technique and even link back in the comments with your completed ornaments.
Creativity Bug ~ Sue
Labels:
acrylic paint,
alcohol ink,
holiday crafts,
ornament
Subscribe to:
Posts (Atom)